Create Your First Drive
Add a storage service in RaiDrive and mount it as a Windows drive letter. Sign in to RaiDrive first — until you do, the app shows the Welcome screen instead of the drive list (see Sign In).
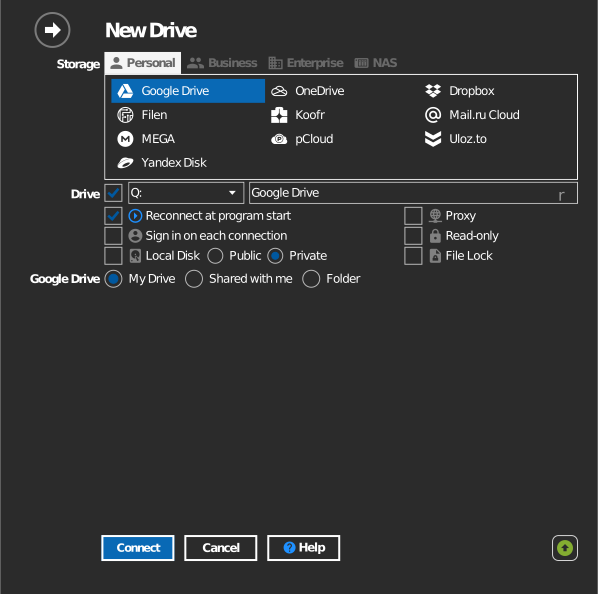
- Click Add in the toolbar.
- Pick a storage service. Services are grouped the same way as this manual: Personal, Business, Enterprise, and NAS.
- Choose a drive letter and a name. The other items on this screen are explained in Options.
- Connect to your storage:
- A cloud account (for example Google Drive): click Connect. A browser window opens; sign in there.
- A NAS or object storage: enter the address and the credentials first, then click Connect.
The new drive appears in File Explorer. Files download only when you open them — mounting does not copy your storage to disk.

Tip
Each service has its own guide with required credentials and settings — see Storage.
Drive buttons
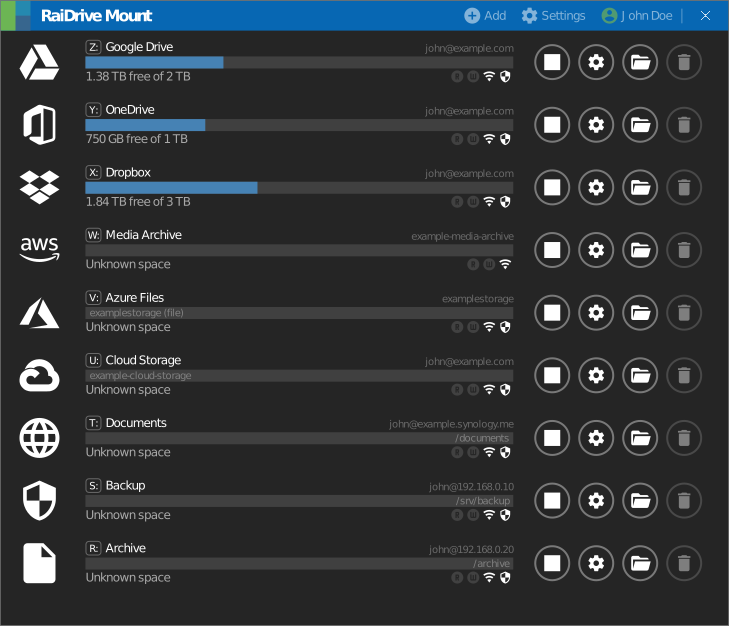
Each drive has four buttons:
| Icon | Button | What it does |
|---|---|---|
  |
Connect / Disconnect | The play/stop button mounts or unmounts the drive in File Explorer. Settings and the account stay saved while disconnected. |
 |
Edit | Opens the drive properties (drive must be disconnected). |
 |
File Explorer | Opens a File Explorer window at the drive. Only enabled while connected. To have this happen automatically on every connect instead of clicking it each time, turn on Run File Explorer when the drive is connected. |
 |
Delete | Removes the drive from the list. This only removes the RaiDrive entry; nothing is deleted from the storage itself. |