ipTIME
Mount an ipTIME NAS as a Windows drive over WebDAV. Enable the WebDAV server on the NAS, and use ipTIME DDNS to reach it from outside your network.
Before you begin
Prepare the following in advance:
- Enable the WebDAV server in the ipTIME NAS management UI (see ipTIME's online guide for your model).
- For access from outside your network, use ipTIME's DDNS
(
<name>.iptime.org).
Connect
- Click Add in the toolbar.
- Choose NAS → ipTIME.
- Select the protocol, enter the server address and port, then your NAS account and password.
- Pick the TLS/SSL version (https only) and timeout if needed, then click Connect.
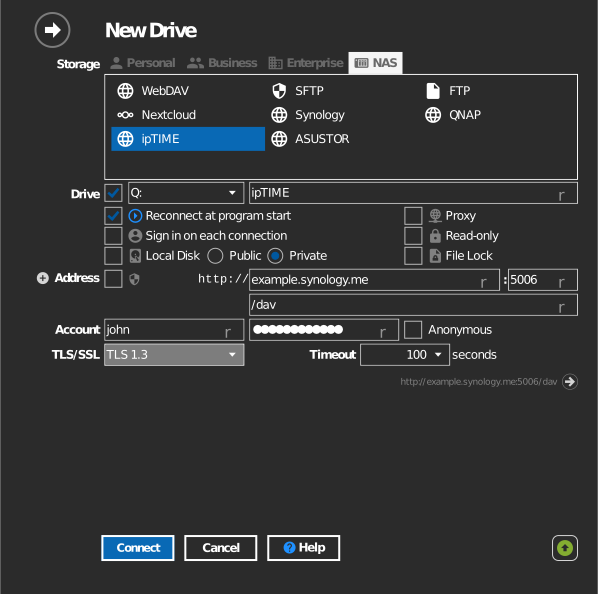
Settings
| Setting | Description | Default |
|---|---|---|
| Protocol | https or http | https |
| Address / Port | NAS host and WebDAV port | — |
| Path | Server folder mounted as the drive root | server root |
| TLS/SSL | TLS version used for https | auto |
| Timeout | Seconds to wait for a server response | — |
| Read-only | Blocks writes to the mounted drive | off |
Behavior & limits
- Throughput is limited by the NAS hardware; large parallel transfers can saturate low-end models.
- ipTIME's WebDAV server does not support keeping the original Date modified when copying — the drive setting Maintain "Date modified" of files and folders has no effect here.
Troubleshooting
| Symptom | Cause | Fix |
|---|---|---|
| Connection refused | WebDAV server disabled or wrong port | Enable WebDAV in the NAS settings; confirm the port |
| Works on LAN only | Router not forwarding the WebDAV port | Forward the port; use the ipTIME DDNS hostname |