Cloudflare R2
Mount a Cloudflare R2 bucket as a Windows drive.
Before you begin
Prepare the following in advance:
- Your Account ID.
- An R2 API token's Access Key ID / Secret Access Key.
Where to get them — in the Cloudflare dashboard:
- Open R2 — the Account ID is shown on the overview page.
- Click Manage R2 API Tokens → Create API Token.
- Give it Object Read & Write permission (scope it to a bucket if you like), then click Create.
- Copy the Access Key ID and Secret Access Key — they are shown only once.
Help from Cloudflare
Connect
- Click Add in the toolbar.
- Choose Enterprise → Cloudflare R2.
- Enter the Account ID, Access Key ID, and Secret Access Key, then click the Refresh button next to the bucket field.
- Select the bucket and click Connect.
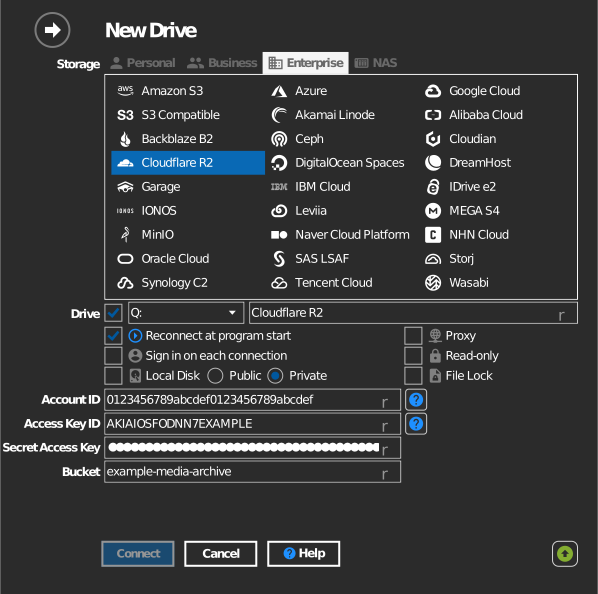
Manual bucket entry
If your key is not allowed to list buckets, tick the checkbox to the left of the bucket field and type the bucket name directly.
Settings
| Setting | Description | Default |
|---|---|---|
| Account ID | Identifies your R2 endpoint (<account-id>.r2.cloudflarestorage.com) |
— |
| Access Key ID / Secret Access Key | From an R2 API token | — |
| Bucket | The bucket to mount (list or manual entry) | — |
| Read-only | Blocks writes to the mounted drive | off |
Behavior & limits
- R2 has no per-bucket regions — every bucket is reached through your account endpoint; location is automatic (with optional location hints) — see Cloudflare: R2 data location.
Troubleshooting
| Symptom | Cause | Fix |
|---|---|---|
| Authentication fails | Token lacks Object Read & Write, or wrong Account ID | Re-create the R2 API token; copy the Account ID exactly |
| Bucket list empty | Token scoped to specific buckets | Type the bucket name manually |